We recently received a request from a client to design a new thank you page for their online store, intended to load after a form submission.
The client’s Marketing Agency deemed it essential to create a landing page that loads after an appointment submission. This was crucial for their business as it allows them to effectively track conversions.
In Adobe Commerce (formerly Magento 2), a thank you page is a default feature. It ensures that customers always see a thank you page after processing their orders. However, for the contact page or any other appointment script, customers will only receive a confirmation message on the same page.
Catching Conversions: Unraveling the Mystery Behind Effective Tracking
Many freelance marketers and digital marketing agencies mistakenly assume that conversions can only be tracked during page load events (such as a thank you page), a concept primarily applicable to e-commerce transactions.
However, tracking campaigns designed to track leads initially can be effortlessly achieved through Google Tag Manager.
In simpler terms, there’s no need to assign tasks to your development team. As a business owner, you don’t require basic, let alone advanced, development skills for this process.
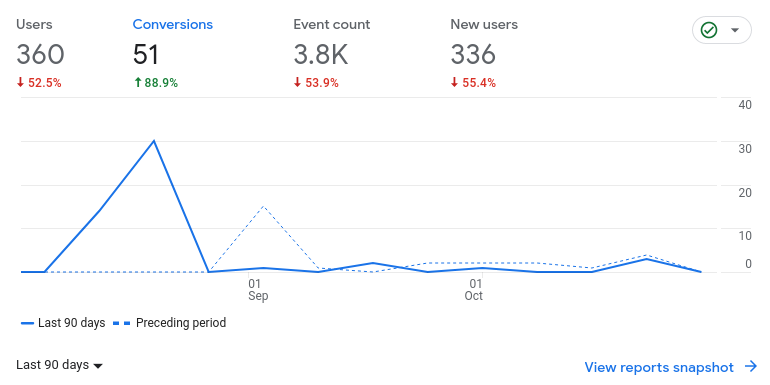
Without the proper tracking code, optimizing the conversion rate for your online Magento2 store won’t be possible.
Setting up a Conversion Event in GA4 (Google Analytics 4) is straightforward and simple. It involves two main steps:
-
Create a Tag in Google Tag Manager
It is assumed that you have a Google account.
To begin, log into Google Tag Manager, create account and a container or select your container if you already have an account created. Additionally, there might be accounts available in your tag manager if a client has shared their property with you.
The container is usually the website property where you wan’t to setup your conversion events, in this case for a lead conversion campaign.
Click on the existing or newly created container.
In your Google tag account manger click on Tags (left hand side menu, second item) then New, click on Tag Configuration , under Featured list select Google Analytics, click on Google Analytics: GA4 Event.
You will encounter the following screen:
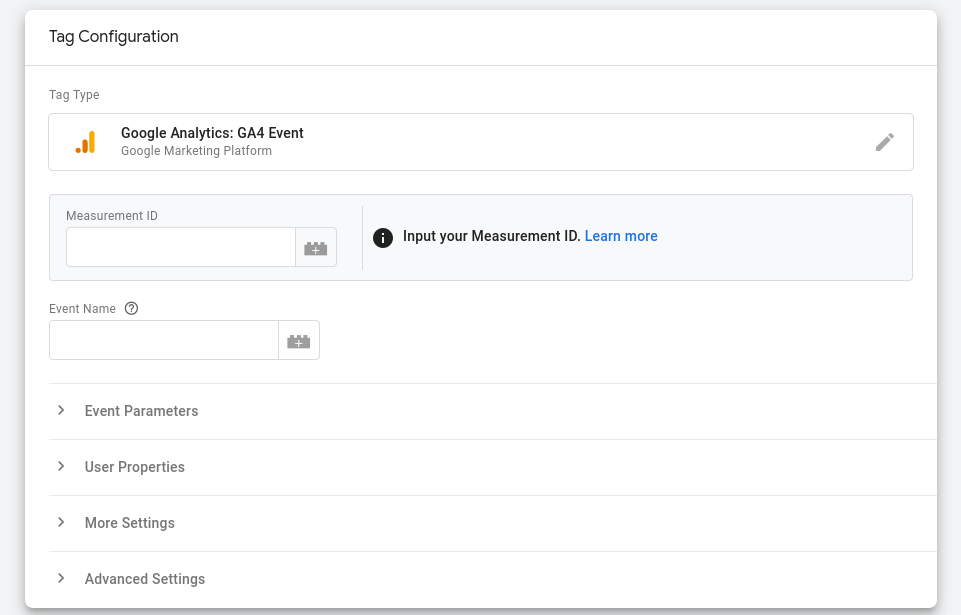
Paste your GA4 Measurement ID from Google Analytics into the Measurement ID field and enter the Event Name, then click Save.
To locate the Measurement ID, visit Google Help Center for Analytics at this link.
A new message will pop up.
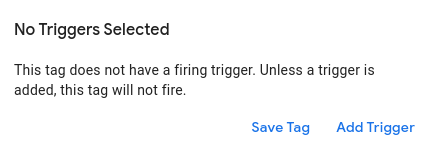
Click on Add Trigger in the same popup window. You’ll find a list of default triggers available.
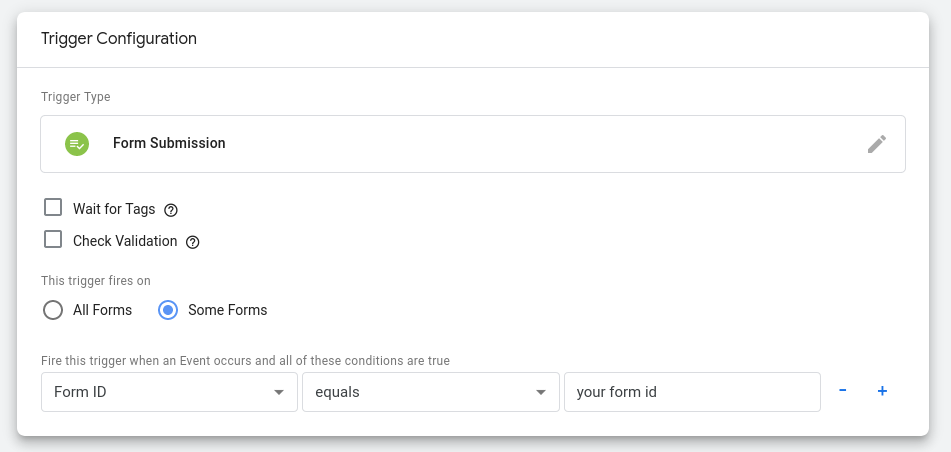
Click on the ‘+’ sign at the top right-hand side to create your new event trigger. Another window will pop up; hover your mouse over that window and click on Trigger Configuration.
Now, this part is crucial and significantly differs from tracking online sales for the drive online sales business objective.
Since the event triggers once a form, such as an appointment form on your online store, gets submitted, scroll down to User Engagement and select the Form Submission trigger type.
In most cases, your online store might have only one appointment form. Therefore, change the trigger configuration from ‘This trigger fires on All Forms’ to the ‘Some Forms‘.
Update the dropdown fields under ‘Fire this trigger when an Event occurs and all of these conditions are true’. Click on ‘Page Hostname‘ and select ‘Choose Built-in Variable…‘, from the list select ‘Form ID‘. Click on ‘contains‘, and choose ‘equals‘. Consult your developer or Magento agency for the form ID of your appointment script. Copy/Paste the form id into the last field.
Leave all other settings as default.
Click ‘Save’.
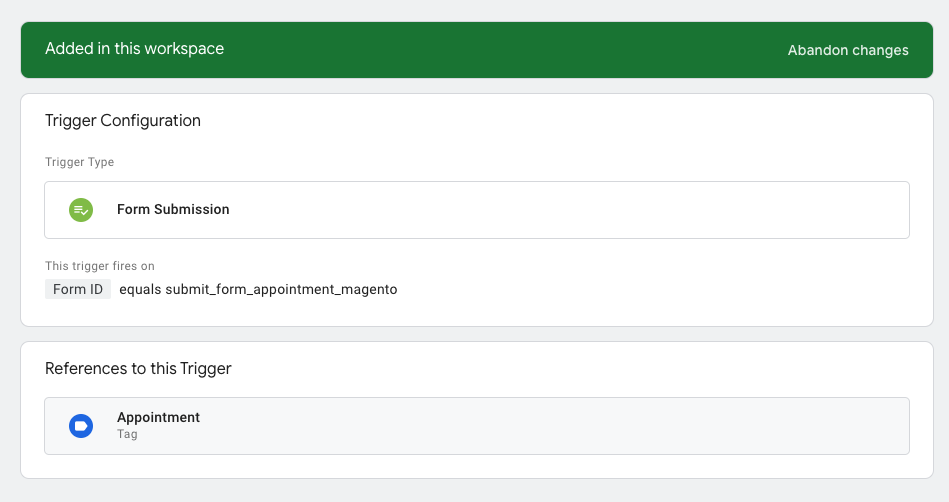
Rename your trigger from ‘Untitled Trigger’ to an event name, for example, ‘Appointment_form_submitted‘.
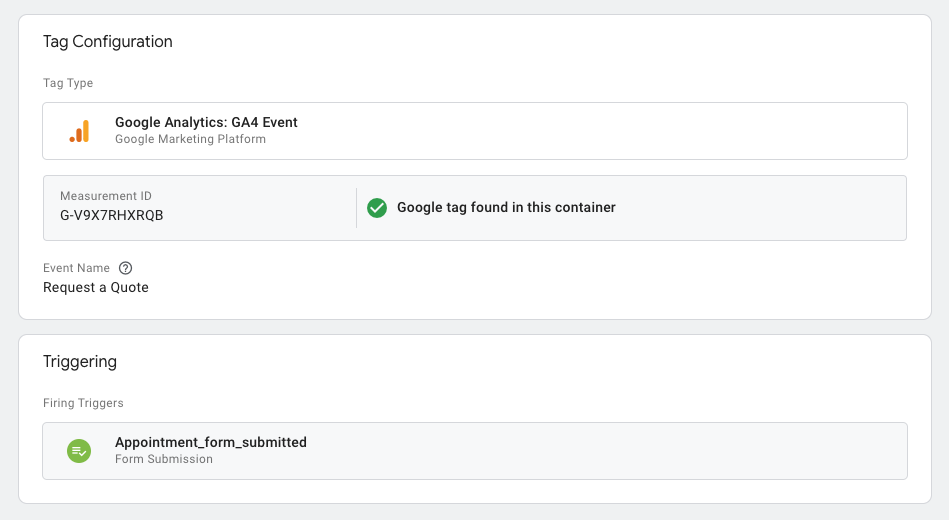
Give your Tag a name, for example, ‘Appointments’. Click ‘Save’.
Congratulations! You have successfully created your custom tag, and it should now be listed in your tags (as shown in the image below).

Before you submit your new tag (set the tag live), install Google Tag Manager into your Magento store. Copy and paste the Google Tag code into a specific section of your Magento website.
This is the only moment where your developer or Magento agency might need to assist. If you are familiar with the Magento admin dashboard, you can navigate to a specific section in the background and paste the Google Tag Manager code yourself.
In both cases, the entire process explained in this article will reduce the task time from hours of work to just 15 minutes of setup and installation.
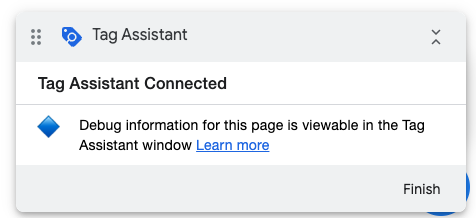
Click ‘Preview’. This will show if your new ‘Appointment‘ tag was installed and triggered properly for the specific event, in our case, the ‘Appointment_form_submitted‘ event.
Complete all required fields in your appointment form and click ‘Submit’.
If your tag was installed correctly, you will see this:
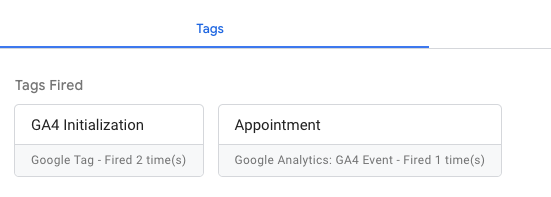
The G4 Initialization tag is essential and must always be fired. As shown in the image above, the custom ‘Appointment’ tag has been triggered, indicating a successful setup. Everything is in order, and we can move on to Google Analytics.
Please note: It may take a few hours for the event to appear in GA4. Once it’s visible in your account, we can proceed to the final step.
-
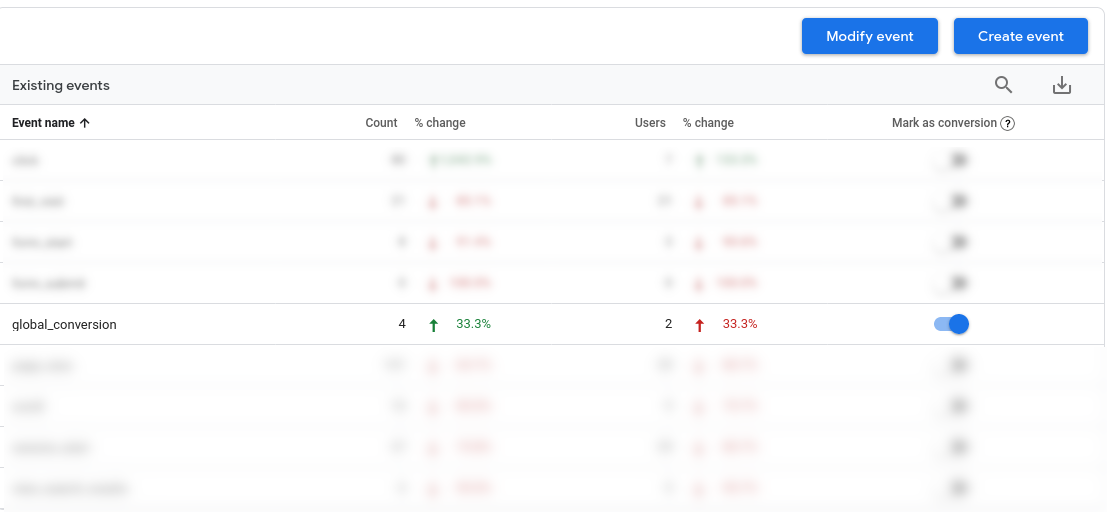
Mark the new Event as Conversion
Log into GA4, navigate to Admin -> Events. A list of all events will be displayed. Identify the event created in step 1 and mark it as a conversion.
That’s it! You’re now set to track your conversions in Google Analytics 4.