The start with a new product was a great motivation for me to write this article explaining how to get started with Adobe Commerce Cloud (former Magento).
Before you can start building an eCommerce website together with your development team on Adobe Cloud Commerce (on the PAAS platform) there are a few requirements that you need to accomplish beforehand.
Initialization of the project
– Account creation for developers through Web-UI (web user interface)
– Granting permissions to developers
– Creating ssh access and enabling SSH keys
– Understanding technologies used on adobe commerce stack
– Setting up local environments based on adobe commerce stack
– Connecting local environments to staging, pre-production, and production
– Adding endpoints to a subdomain and root domains
– Build
There might be additional requirements on top of this list that you might need to implement but those are the subject of additional research and will go outside the scope of this article.
This article describes the first step – adding new users to your project on Adobe Commerce Cloud.
Adobe Commerce Cloud – How to Create Super User Account
To add new users (developers) to a project in Adobe Commerce Cloud (formerly Magento) you can either use Magento-cloud CLI (command line interface) or Web-UI.
The second way is easier for account owners. Some clients don’t like to grant root (owner) access so you might end up on a zoom call explaining to the client how to create the first Super User on the system on his own.
The first step is to add new users and define a certain level of permissions for each user on the system.
In other words, you have to grant access to team members of your eCommerce development agency.
The first step first:
If you aren’t granted the owner-ship account level access your client has to log into his account.
He needs to click on the project menu item within the top menu (click on projects in the top menu).

On the left side hand (desktop computer) click on “Infrastructure Access” then click on the available “Project Access (Web UI)” link (underlined with red on the image below):
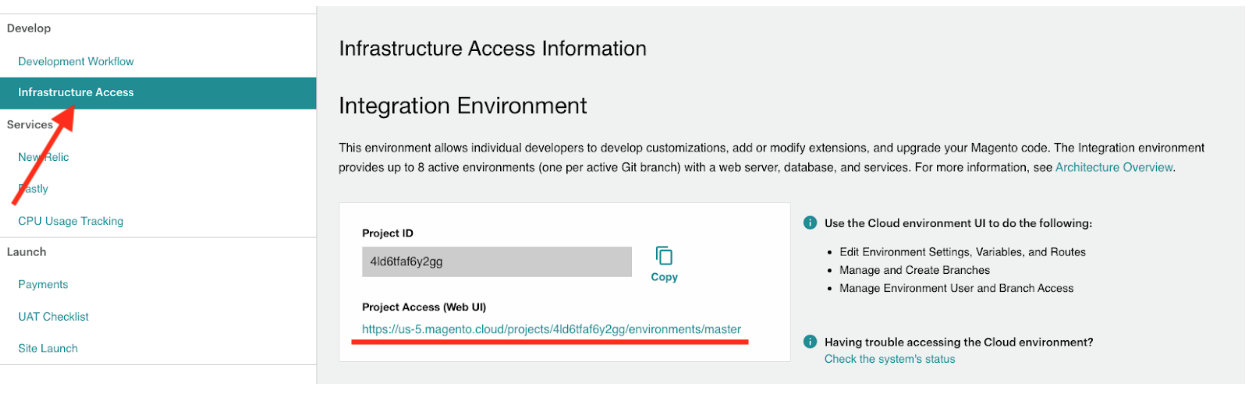
After you click on the ‘Project Access’ link, a new tab will open.
You will see a drop-down menu with all projects listed in the top left corner.
Choose your project from the drop-down menu and click on the small setup icon next to the drop-down menu.
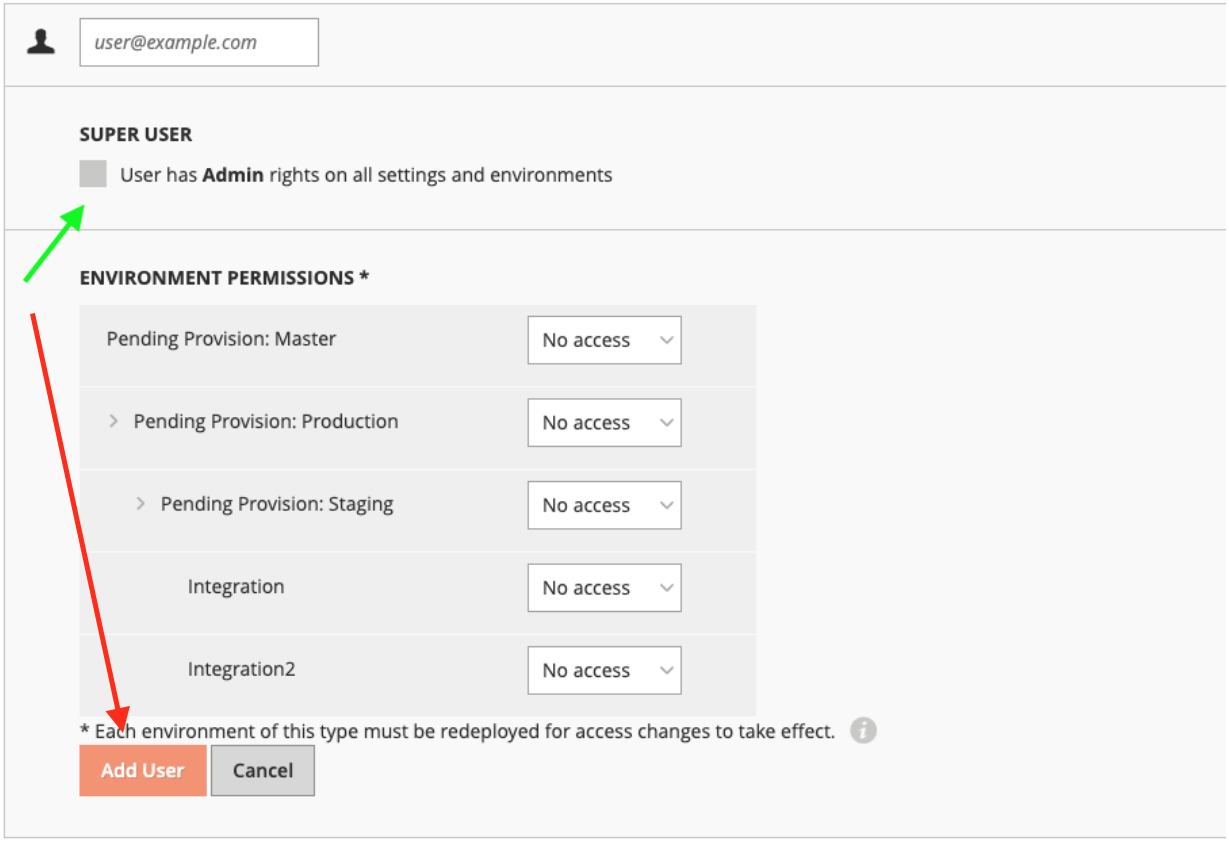
Once you land on the ‘Configure project’ instead of clicking the ‘add user’ button select the check-box underneath “Super User”, and check image below:
Initially, you will have to create one super user account for the magento development agency responsible for the build.
Additionally, add as many users as you need or leave that to your development agency manager.
The agency super user account holder will grant environment access to certain developers from his team.
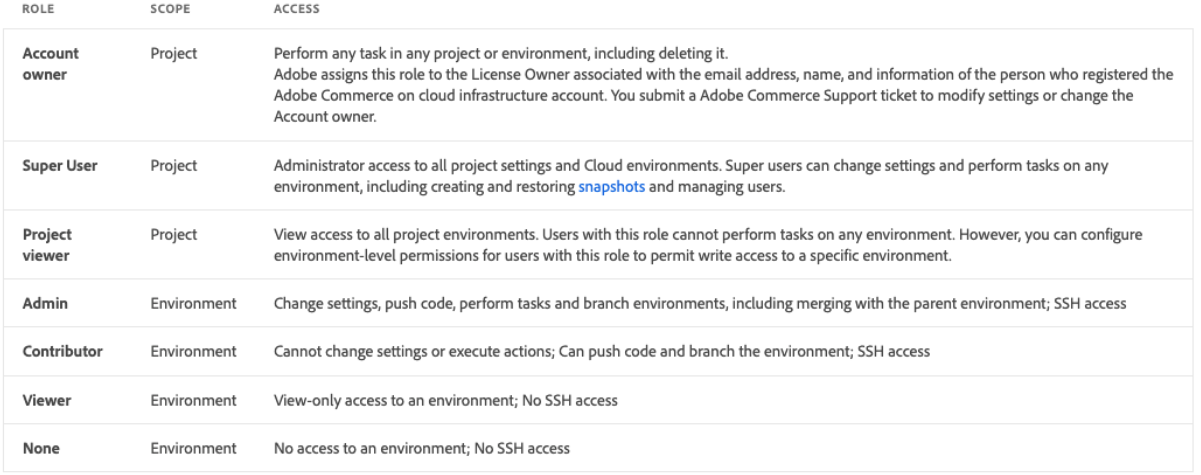
From the security standpoint make sure that you understand each level of permission a user will have.
Email notification not received after Super User account has been created
The newly created Super User won’t receive an invitation email if he already owns an Adobe Commerce account (former Magento).
He needs to log into his Adobe Commerce account or former Magento account to access the project.
From the Project Cloud, he can access certain projects by clicking on available project links.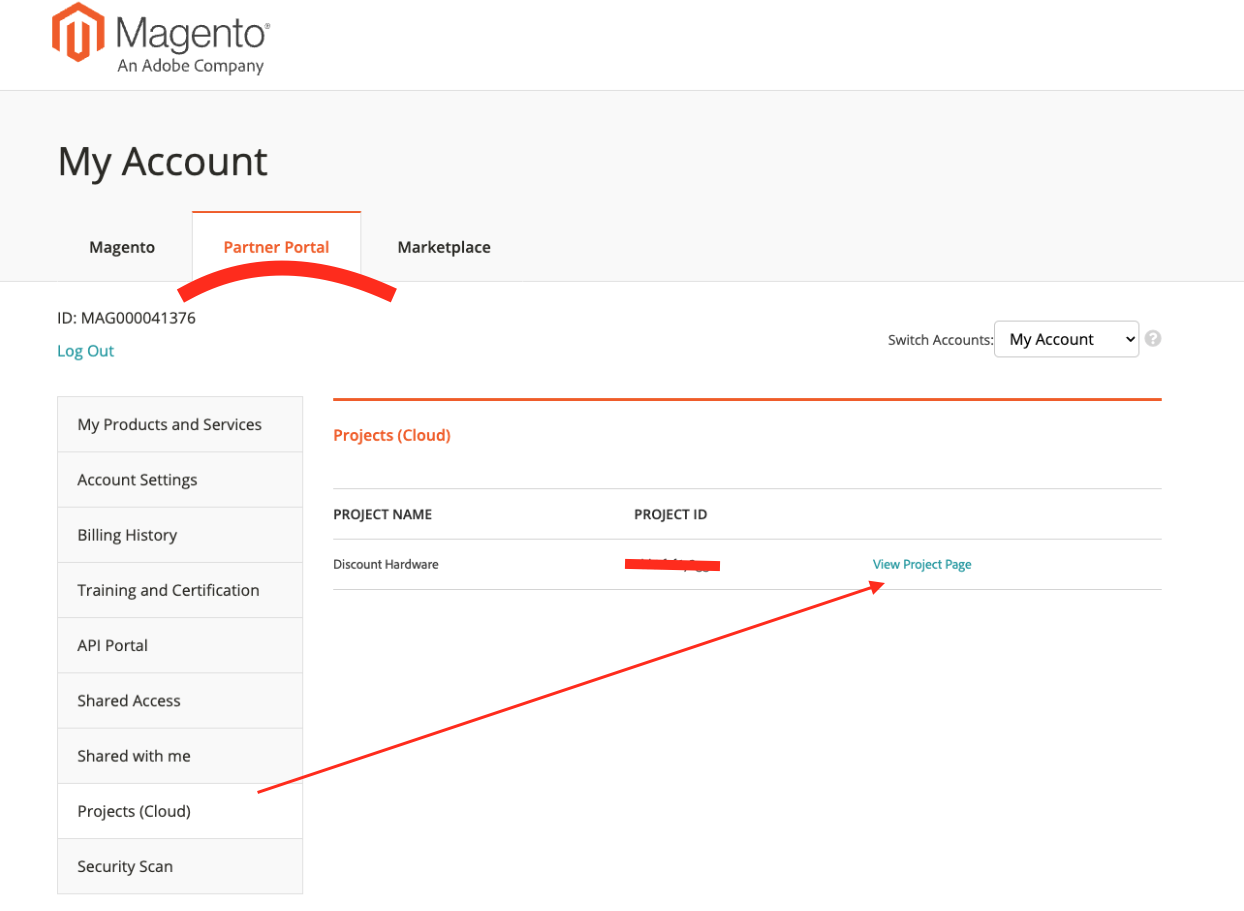
Thanks for reading. I hope it was helpful and it’s worth sharing 🙂 If you have any questions please post in the comment section below.
More articles will come soon as a product of our inspiration whilst we work on another project that runs on Adobe Commerce Cloud.